First order of business was selecting our fate for the rest of the year. We were split up into groups of 3-5, and shown some pitch videos from
various different professors and industry folk on projects they wanted
fulfilled by us. Once shown the pitches, our groups were told to draft an email to Professor Donyanavard
with our team members and an ordered list of projects based on preference.
While all of the pitches were interesting, I had my eyes set on only one project: Dr. Hyunjong Choi's F1Tenth Racecar.
Professor Choi had previously participated in multiple competitions and was looking for students that were interested in research to collaborate with his
Real-Time Embedded & Control Systems Laboratory.
I would say that getting this project was luck, but I also believe that nobody else in that room wanted it as badly as I did. See, Professor
Donyanavard stated that he would only be accepting emails once it hit 6:00pm; challenge accepted. After some brief deliberation with my team, I drafted up an
email on my laptop. Suddenly, a thought came to mind: if every student in this classroom was also trying to send an email at 6 on the dot, and we were all
connected to the school wifi on our laptops, everyone would have the same ping. I made a quick decision to close my laptop and log into the computer lab desktop.
The plan now was to send the email from the school desktop because it was connected to the ethernet of the same network, guaranteeing a faster connection than everyone else.
But just to be extra sure, I also had the national atomic clock pulled up on the screen. Tapping my foot like a metronome by the second, a skill I had never appreciated outside
of drumming, I had my finger hovering the send button ready to click at the very millisecond the clock showed 6. And, after a tense few minutes I had successfully
locked our group into what I believe to be the best project offered.
F1Tenth Racecar (Senior Capstone) - Part I: Intro and Design
I could drive this with my eyes closed!
Preface
This year at SDSU,
Dr. Bryan Donyanavard,
offered a Senior Capstone class for computer science students. This
was the first time this class had been offered and I got to be one of
the test monkeys piloting the program. With a strong emphasis on group
collaboration, solving real problems, and getting a feel for what it's
like to fulfill a product and present to a non-technical audience.
This is part 1 where I discuss the initial project and the build of the car.
This is part 1 where I discuss the initial project and the build of the car.
Project Selection
Assembling the Car
After a few weeks of preliminary research and patiently waiting for electronics from China, we received all the components necessary to
assemble our car, except for the frame which would hold our sensors around the controller. Luckily for me, I've been a hobbiest 3D printer since middle school
and have some experience with using Blender (being a jack of all trades comes in handy sometimes).
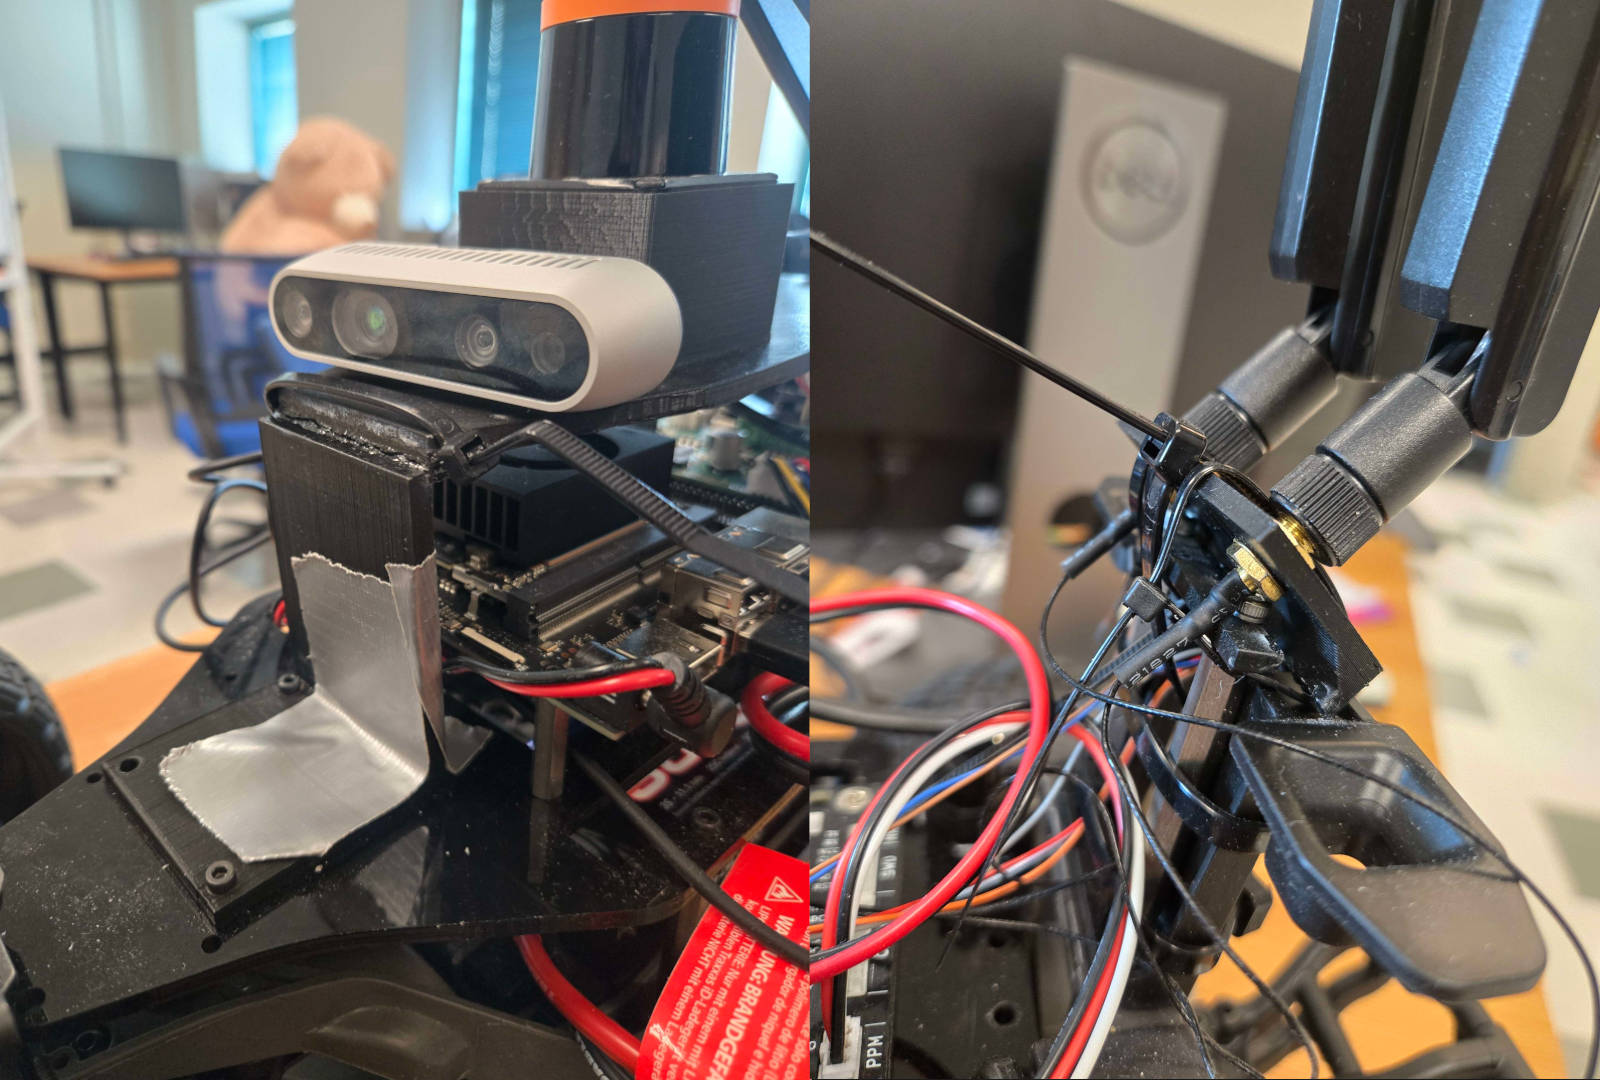
The builds created by the teams before me all shared one major flaw, it was extremely cumbersome to take apart the car for maintenance and modifications. The sensors
were mounted with screws in tiny corners impossible to reach with a screwdriver. I also felt like the electronic components of the other designs were too exposed, and
that made me nervous considering the high likelihood we would crash the car repeatedly.
The idea was simple, use standoffs and an L shape piece which we could screw onto the bottom plate of the car to hold up the LiDAR and the depth perception camera. For the camera, rather than relying on the two screws on the back side, using a threaded piece that could be tightened by hand to secure it from the underside.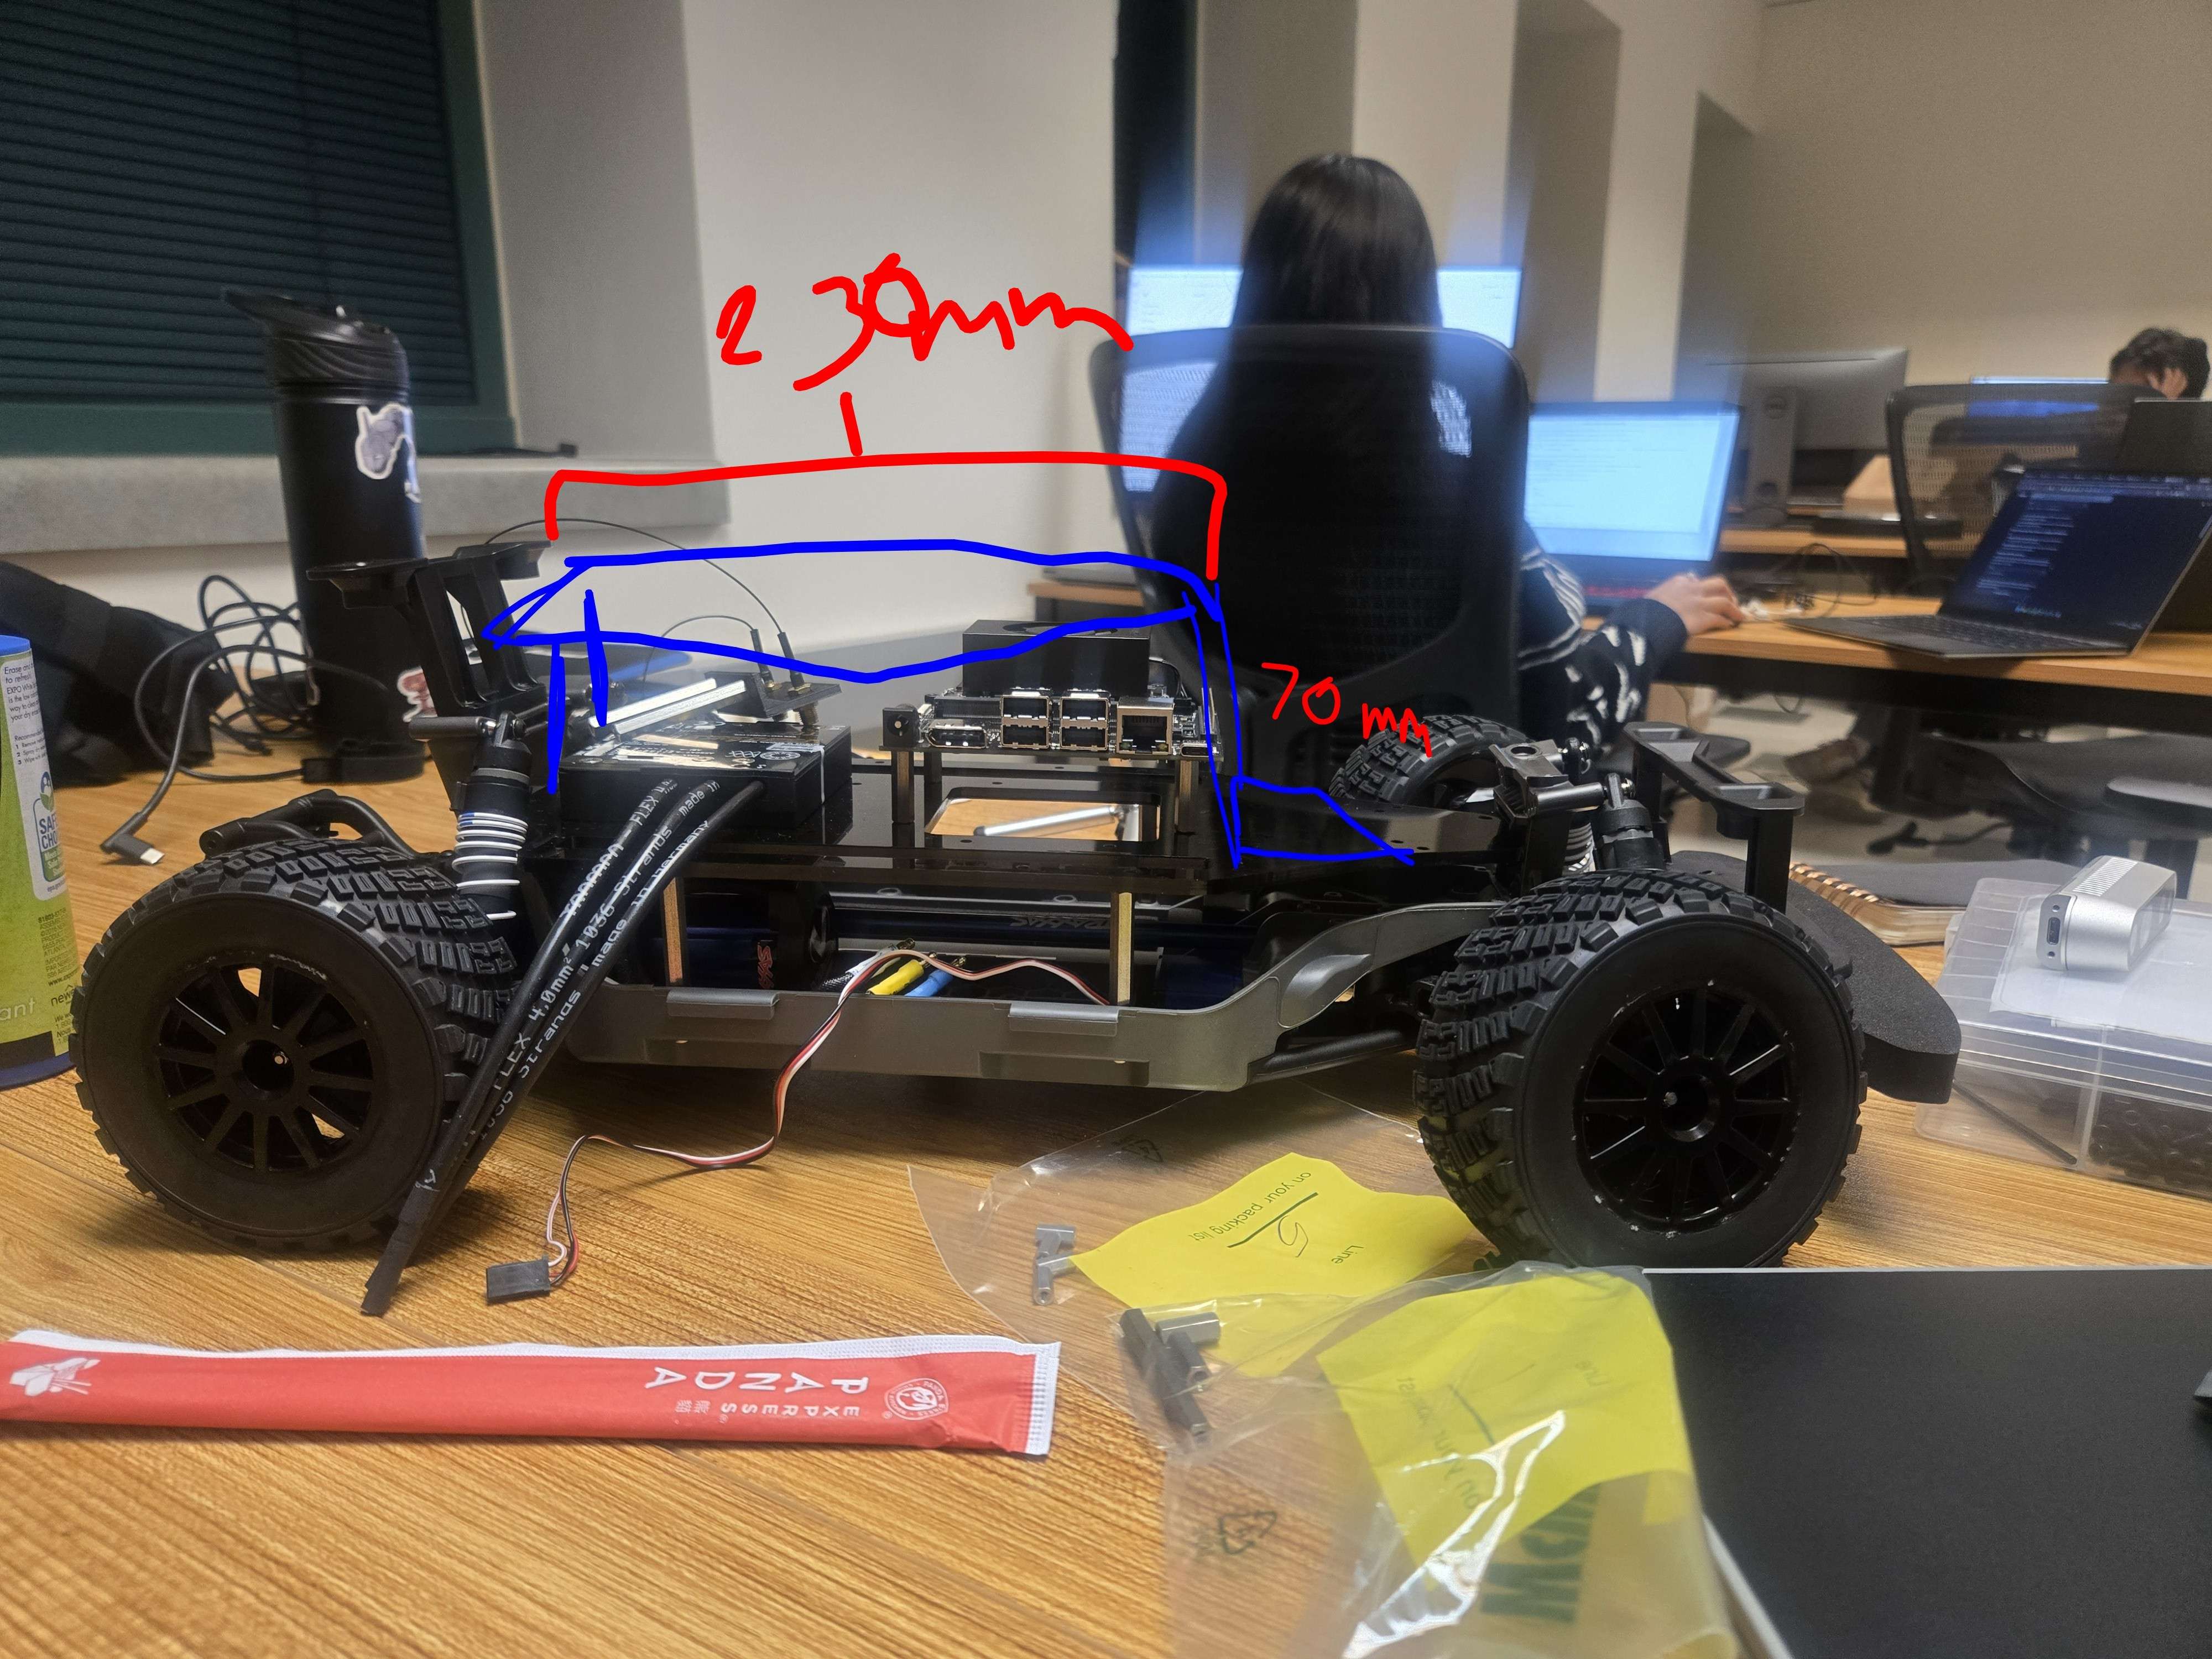
And, after some work in Blender and the dusting off of my 3D Printer, we were finally able to start testing on the physical car.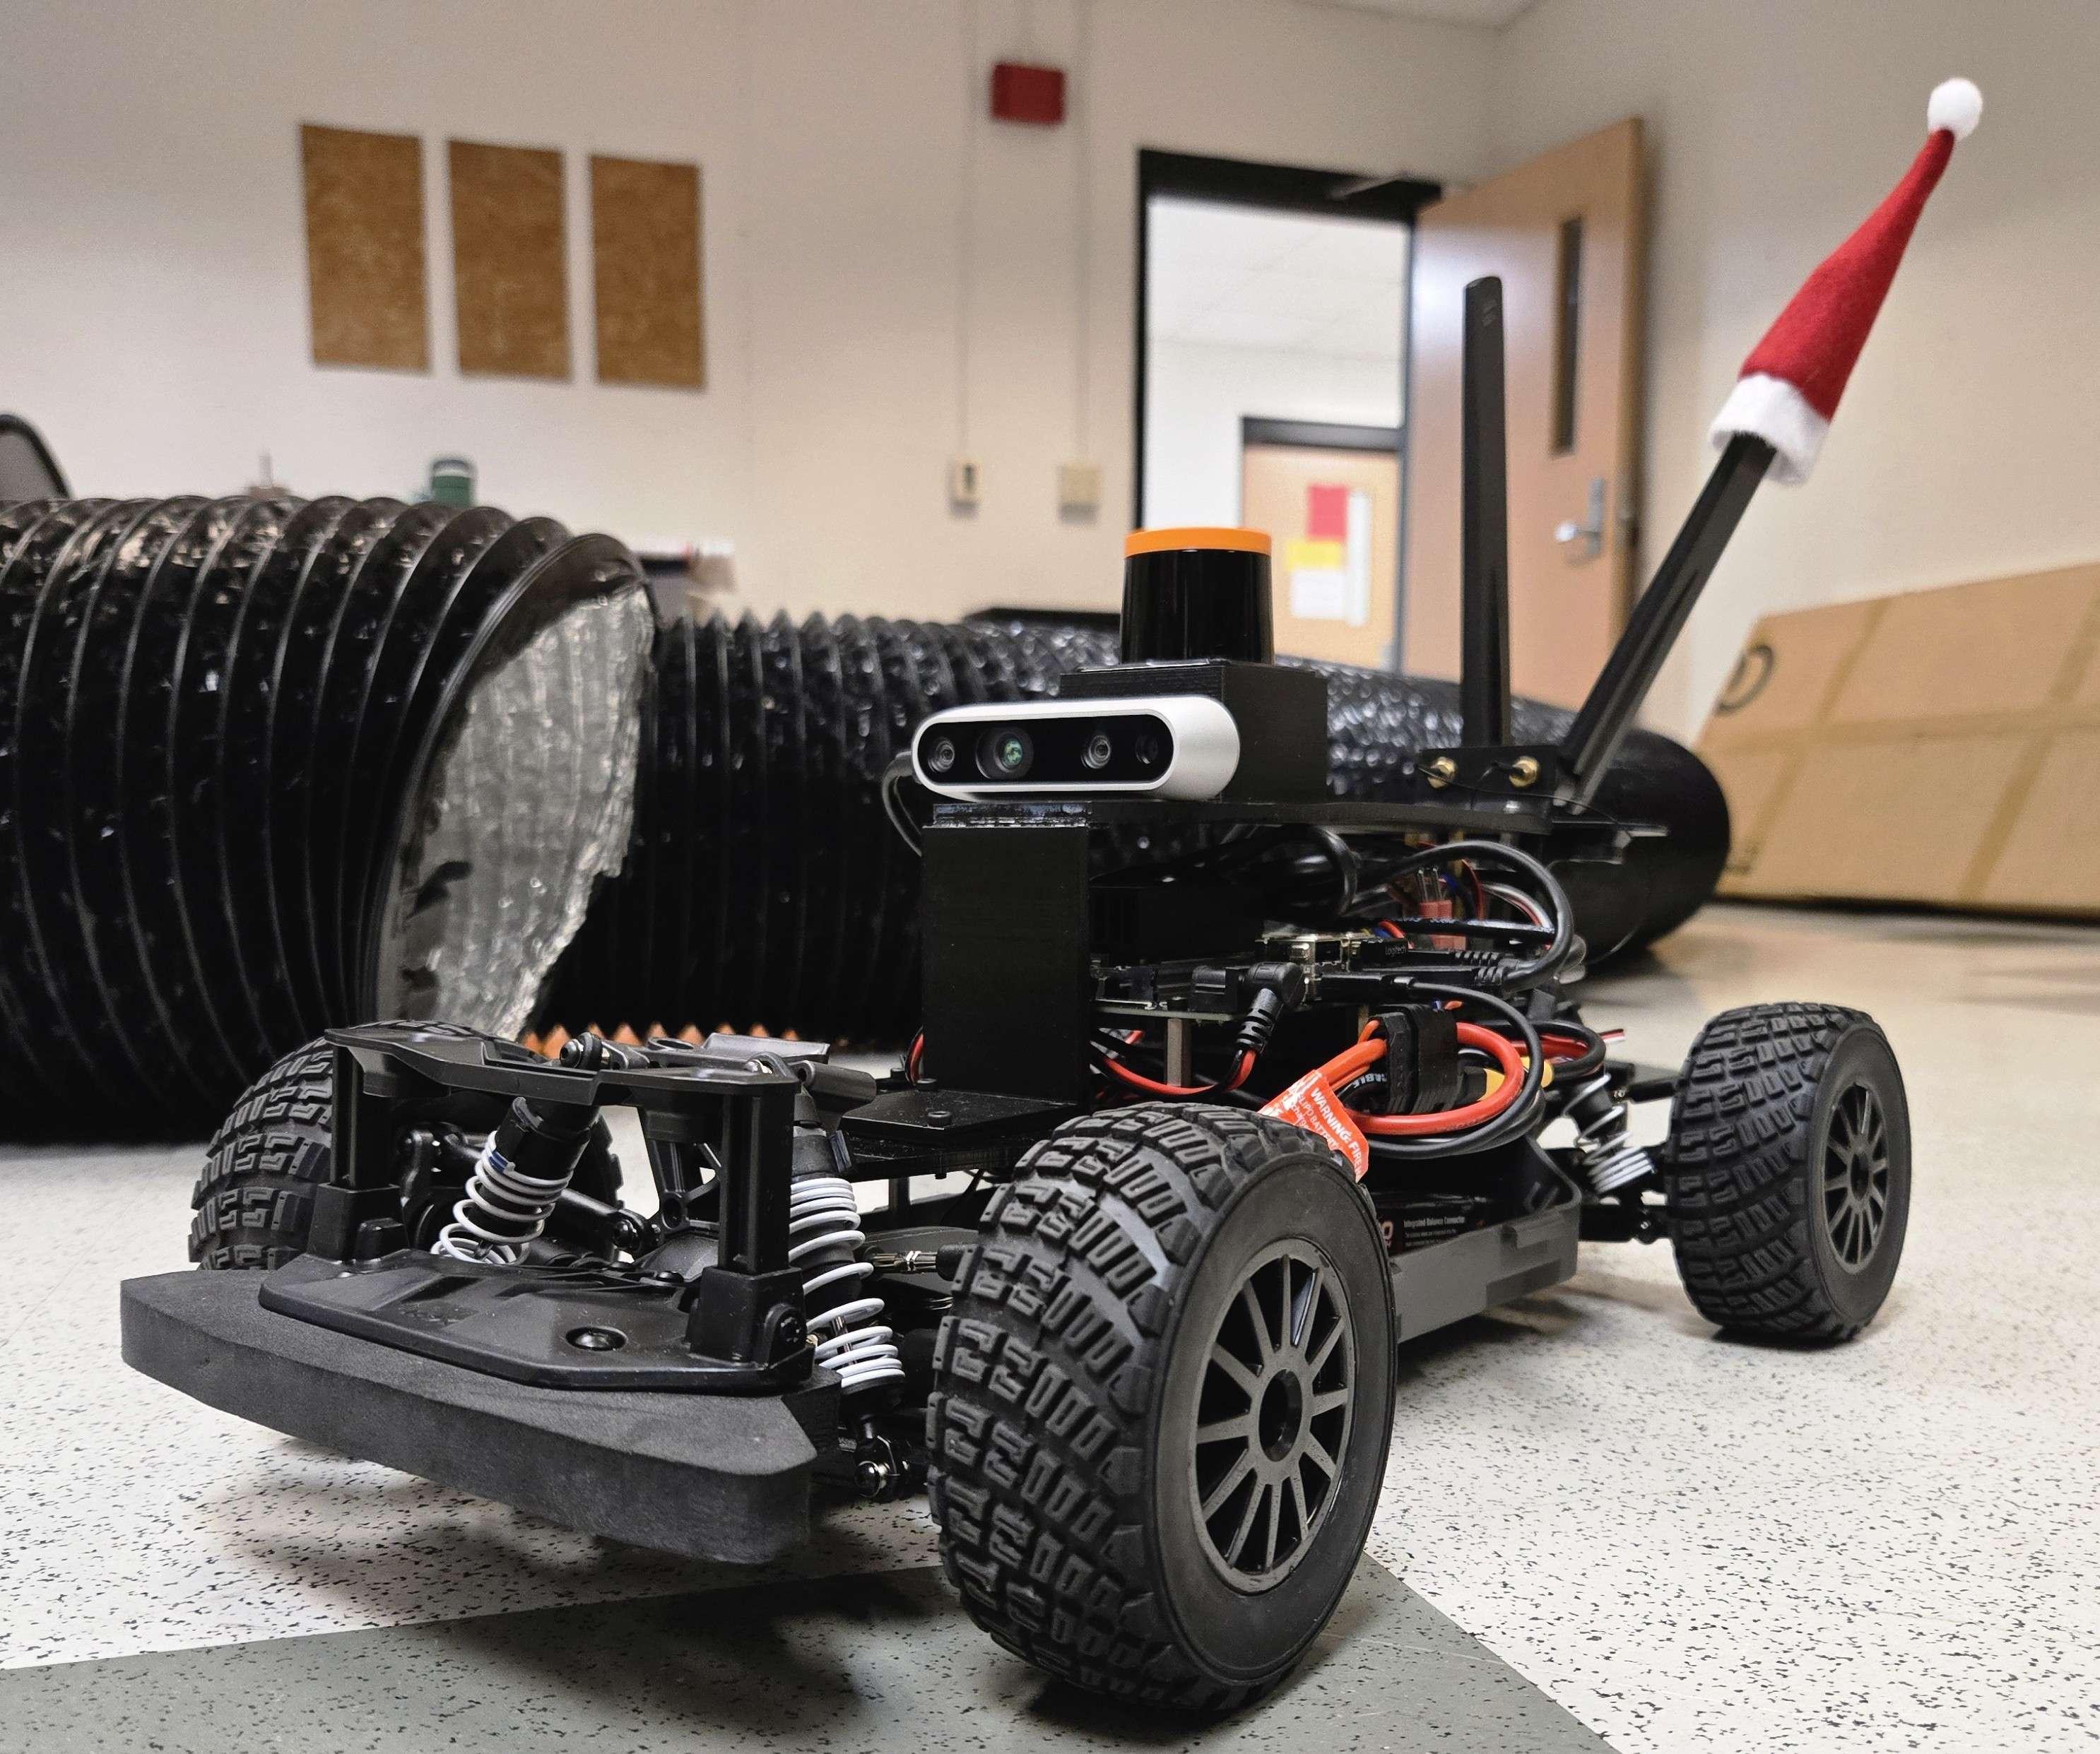
My design is pretty simple, but keeps everything nice and neatly tucked within a top plate that secures our sensors. And this design would serve its purpose for the first half of our senior year.
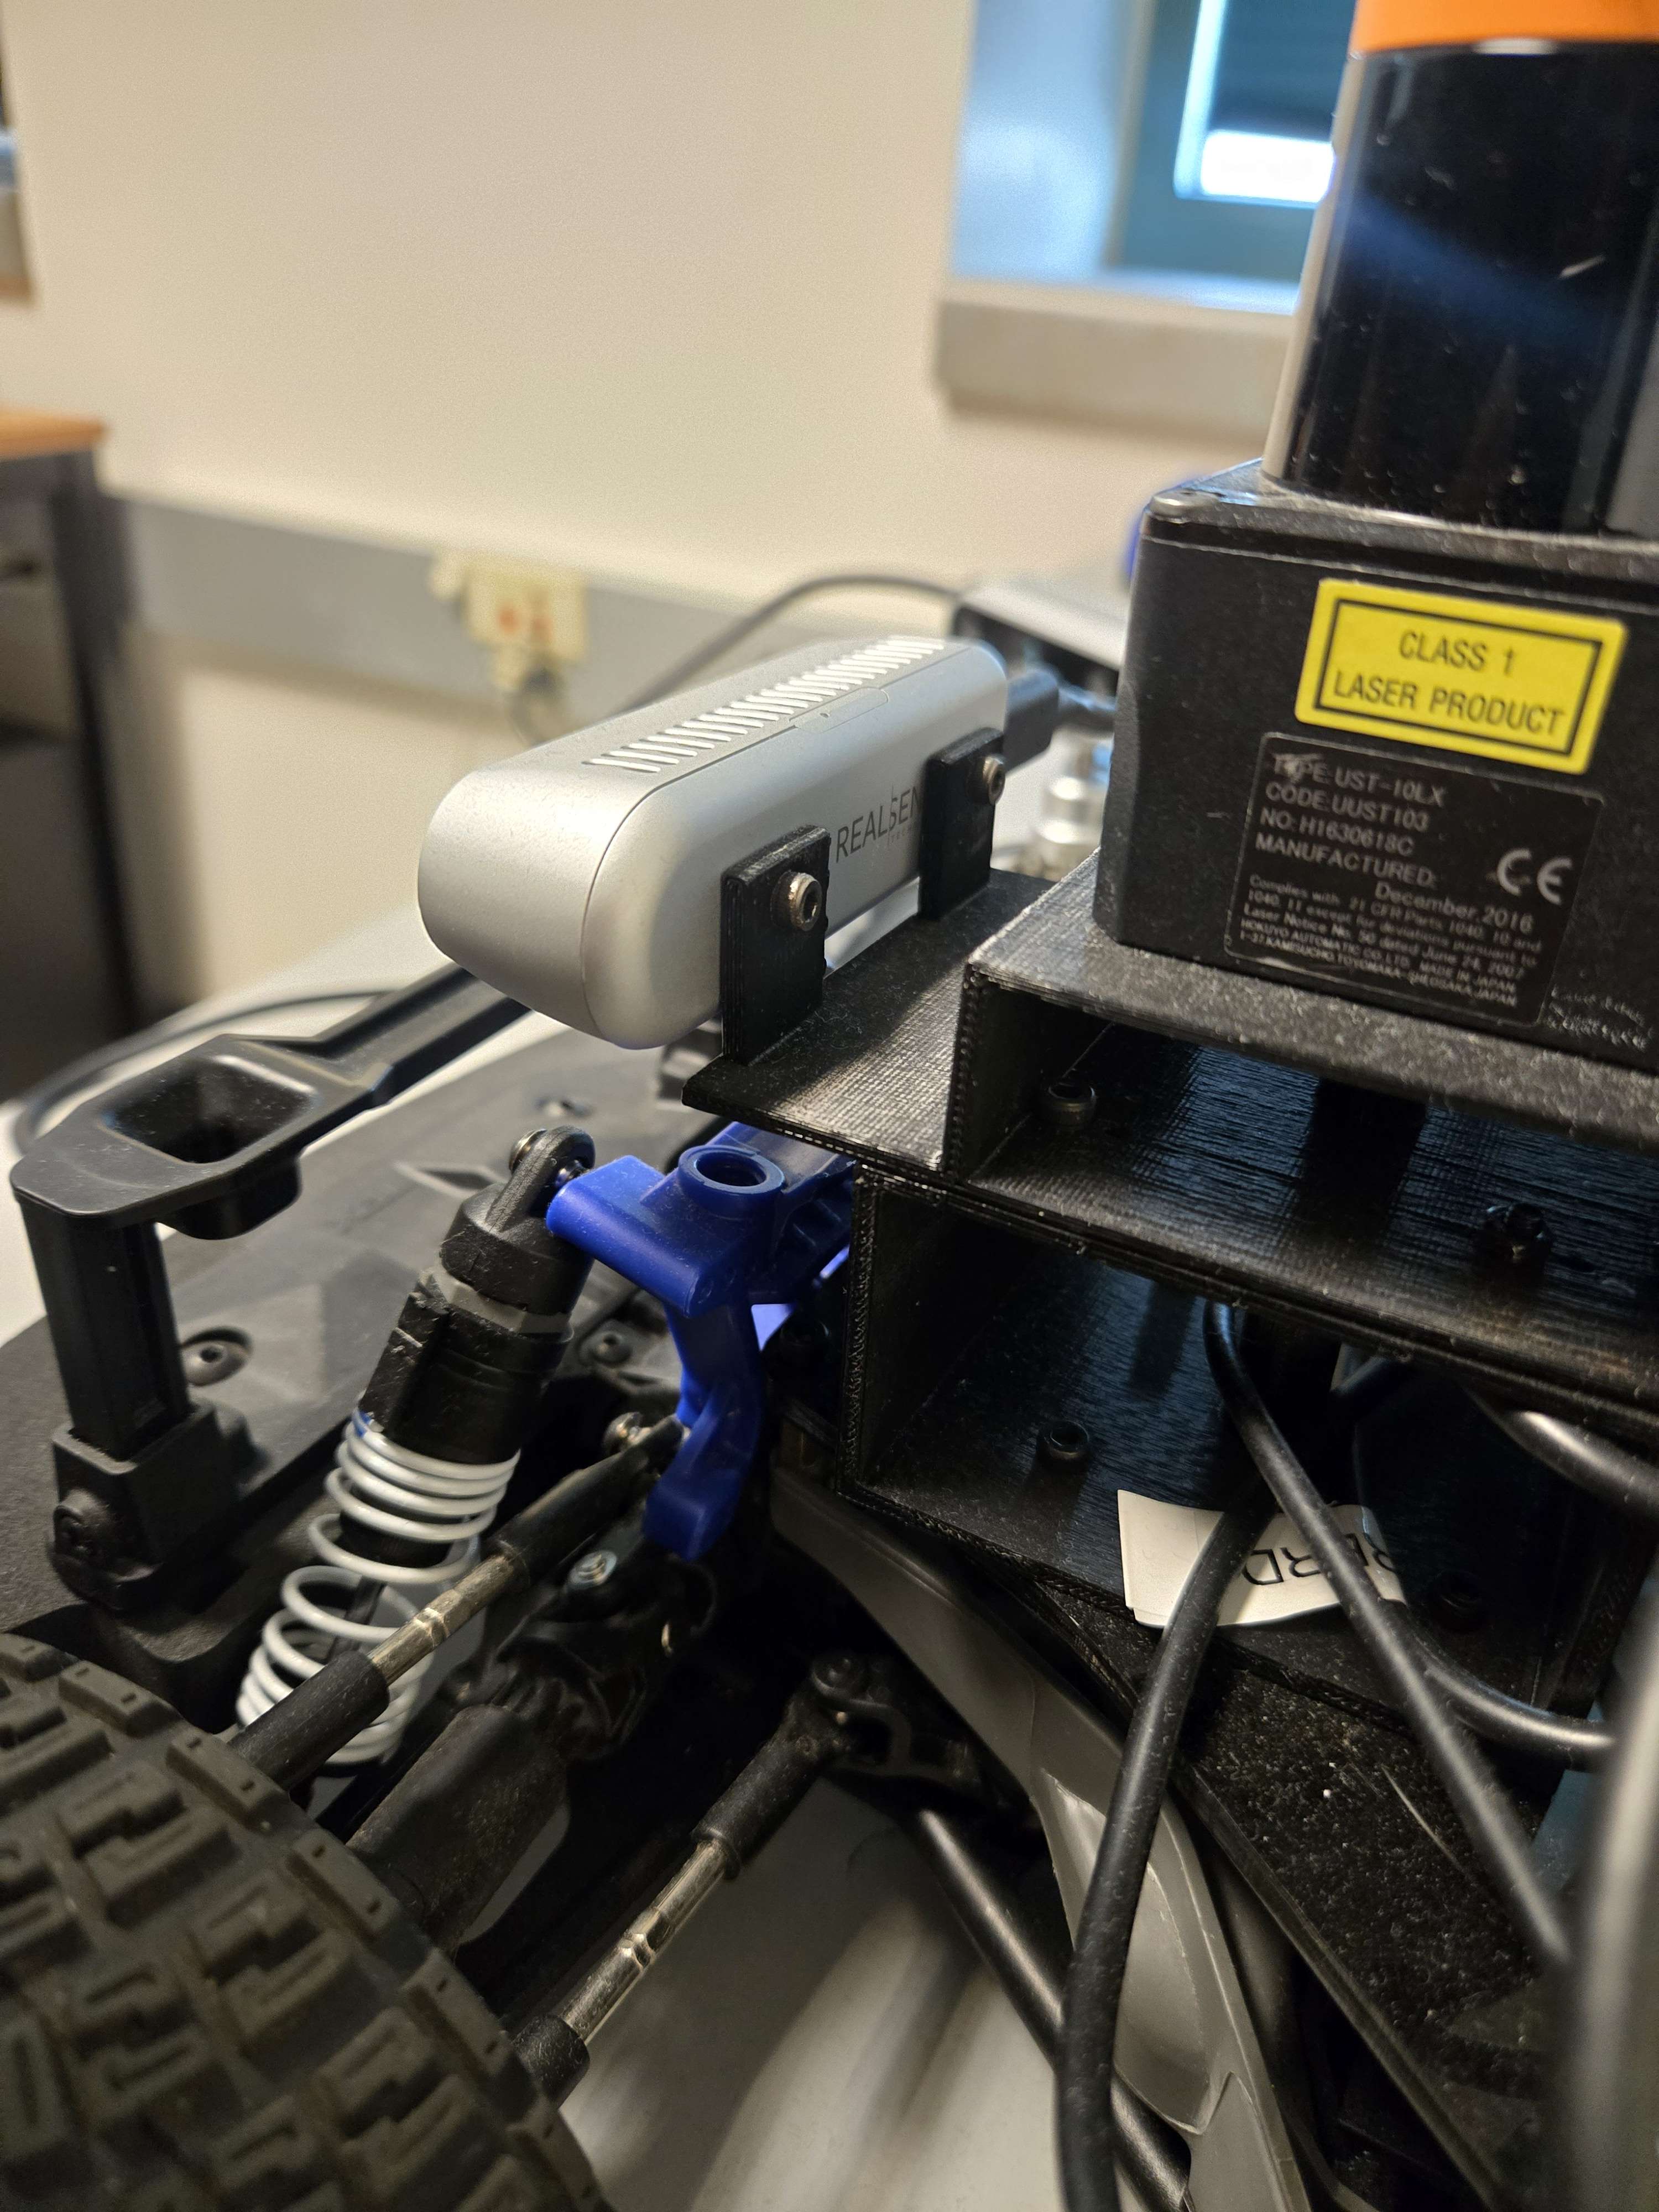
One of professor Choi's other race cars. The depth perception camera is mounted with screws on the back blocked by where the LiDAR is secured.
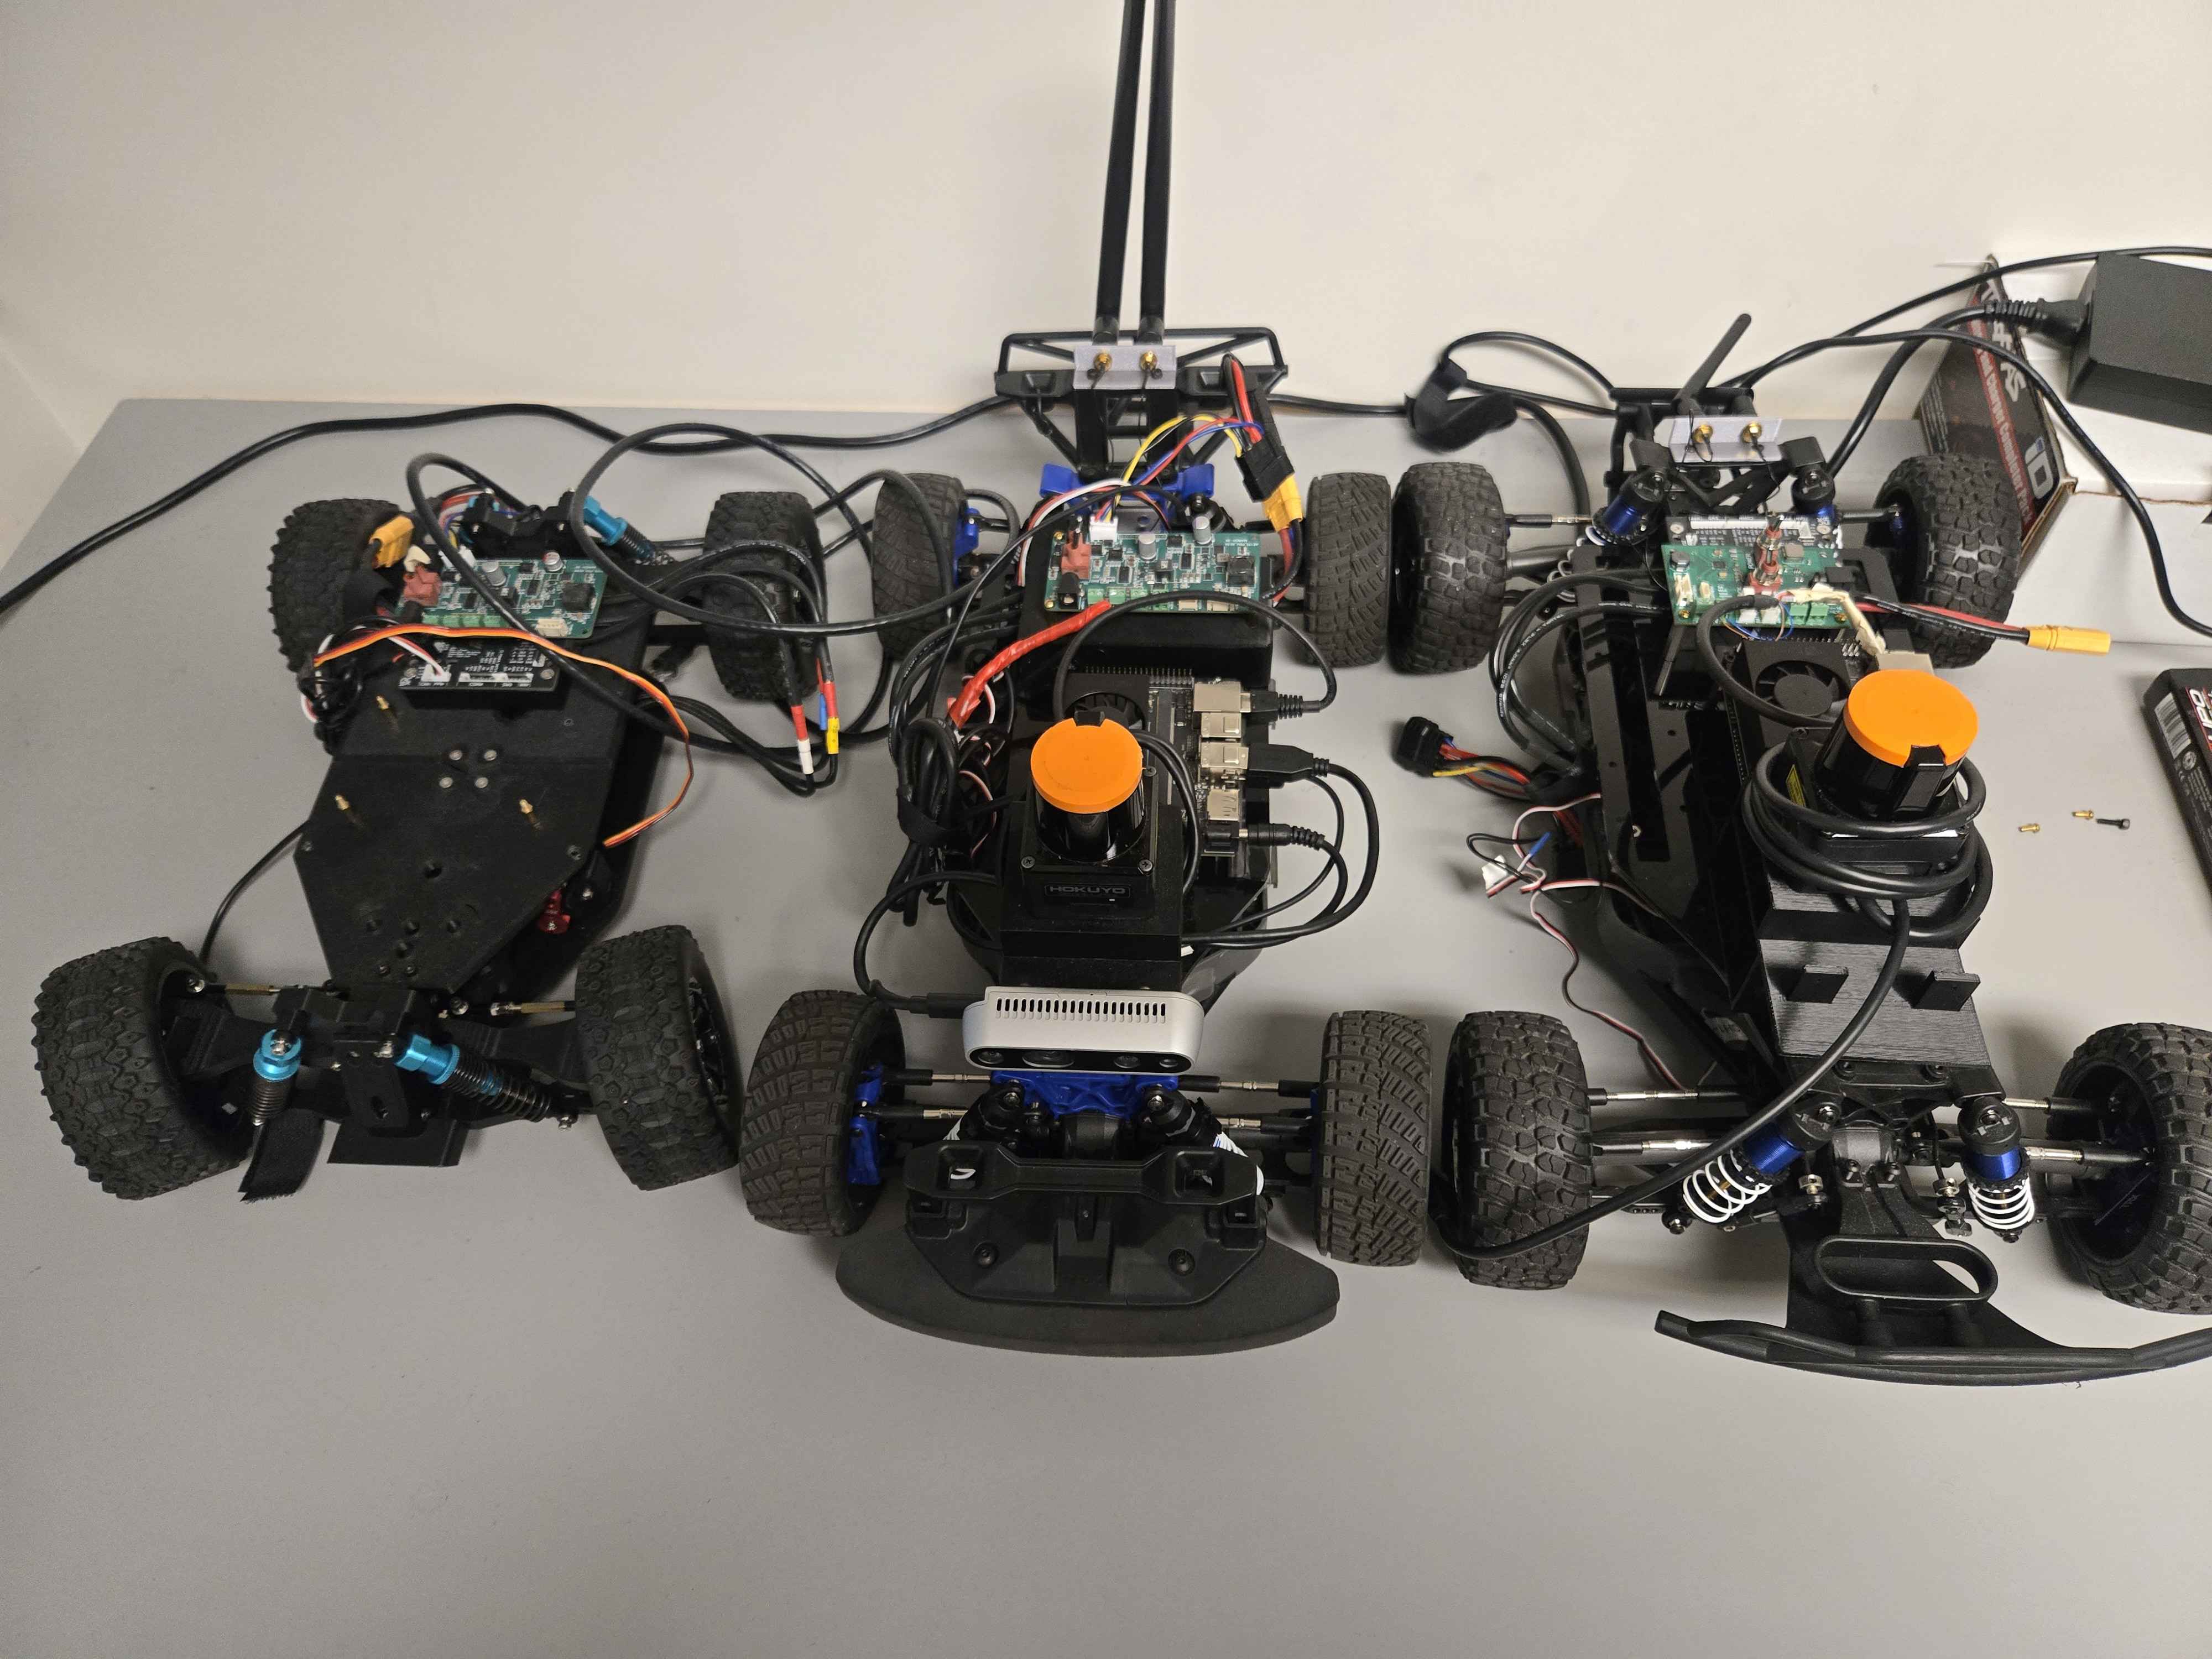
The cars built / being built by other teams. Here you can see the powerboard and Jetson are very exposed.
The idea was simple, use standoffs and an L shape piece which we could screw onto the bottom plate of the car to hold up the LiDAR and the depth perception camera. For the camera, rather than relying on the two screws on the back side, using a threaded piece that could be tightened by hand to secure it from the underside.
The rough sketch
And, after some work in Blender and the dusting off of my 3D Printer, we were finally able to start testing on the physical car.
William v1.0 comes to life!
My design is pretty simple, but keeps everything nice and neatly tucked within a top plate that secures our sensors. And this design would serve its purpose for the first half of our senior year.
William v2.0
After a semester's worth of successful crashing testing, William was not looking the best. I had foolishly
overestimated the strength of plastic welding the two pieces together with a soldering iron, along with the durability
of spools of PLA I've had in my closet for 8+ years.
So back to the drawing board; aftercrashing working with the car for a few months and having to glue it back together several times, I had a good idea of where the
weakest points of the design were.
The first improvement was to design a physical interlocking component integrated into the two pieces rather than relying on melting or gluing them together. I ended up with this design, that snaps into place with a satisfying click. The triangular slopes are angled so that the piece can be printed on its side, if you've had experience working with 3d printing then you'll understand the importance of print orientation and how it affects the structural integrity. Tl;dr, due to how a 3d printer stacks material in layers, the items created are weakest between these vertical layers, and strongest on the horizontal axis where a constant flow of material is extruded.
In order to ensure a secure connection between the two pieces, I also extended the surface area which the two pieces have contact with each other, and threaded the screw which holds the depth camera through both pieces.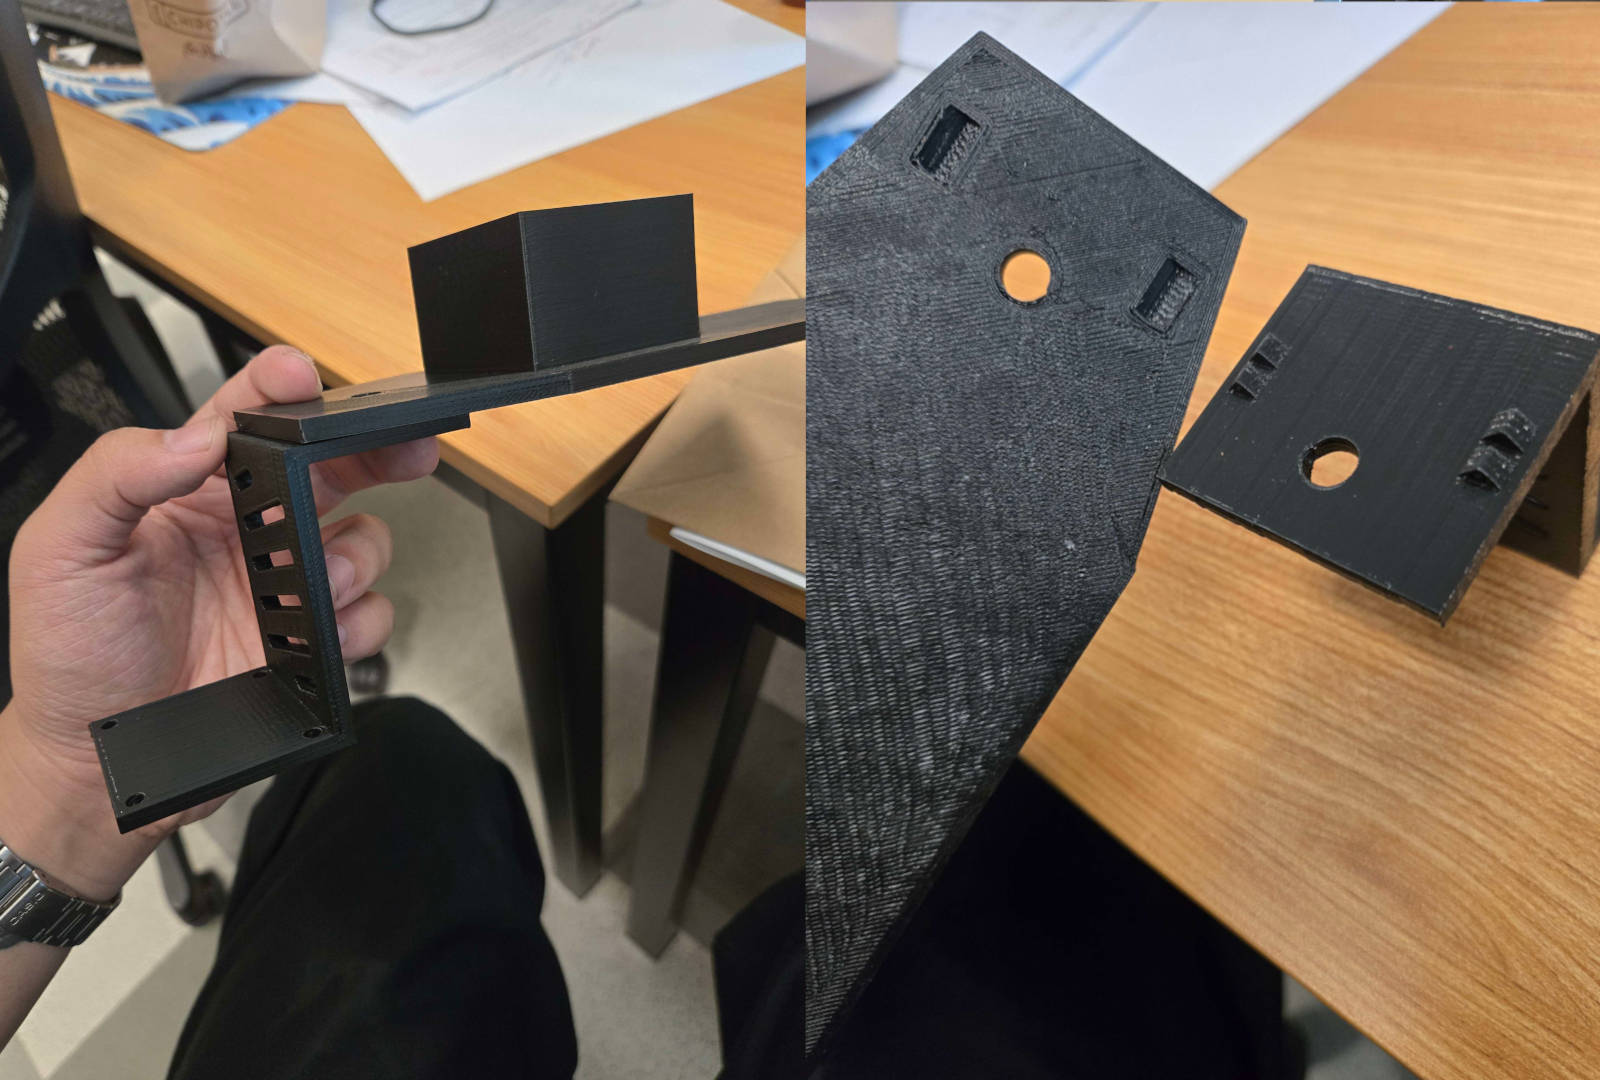
I also added some sweet looking vents to the front of the plate to reduce the drag. In all honesty this propably doesn't affect the speed very much at the scale of our vehicle, but I thought it looked really cool and makes our car stand out.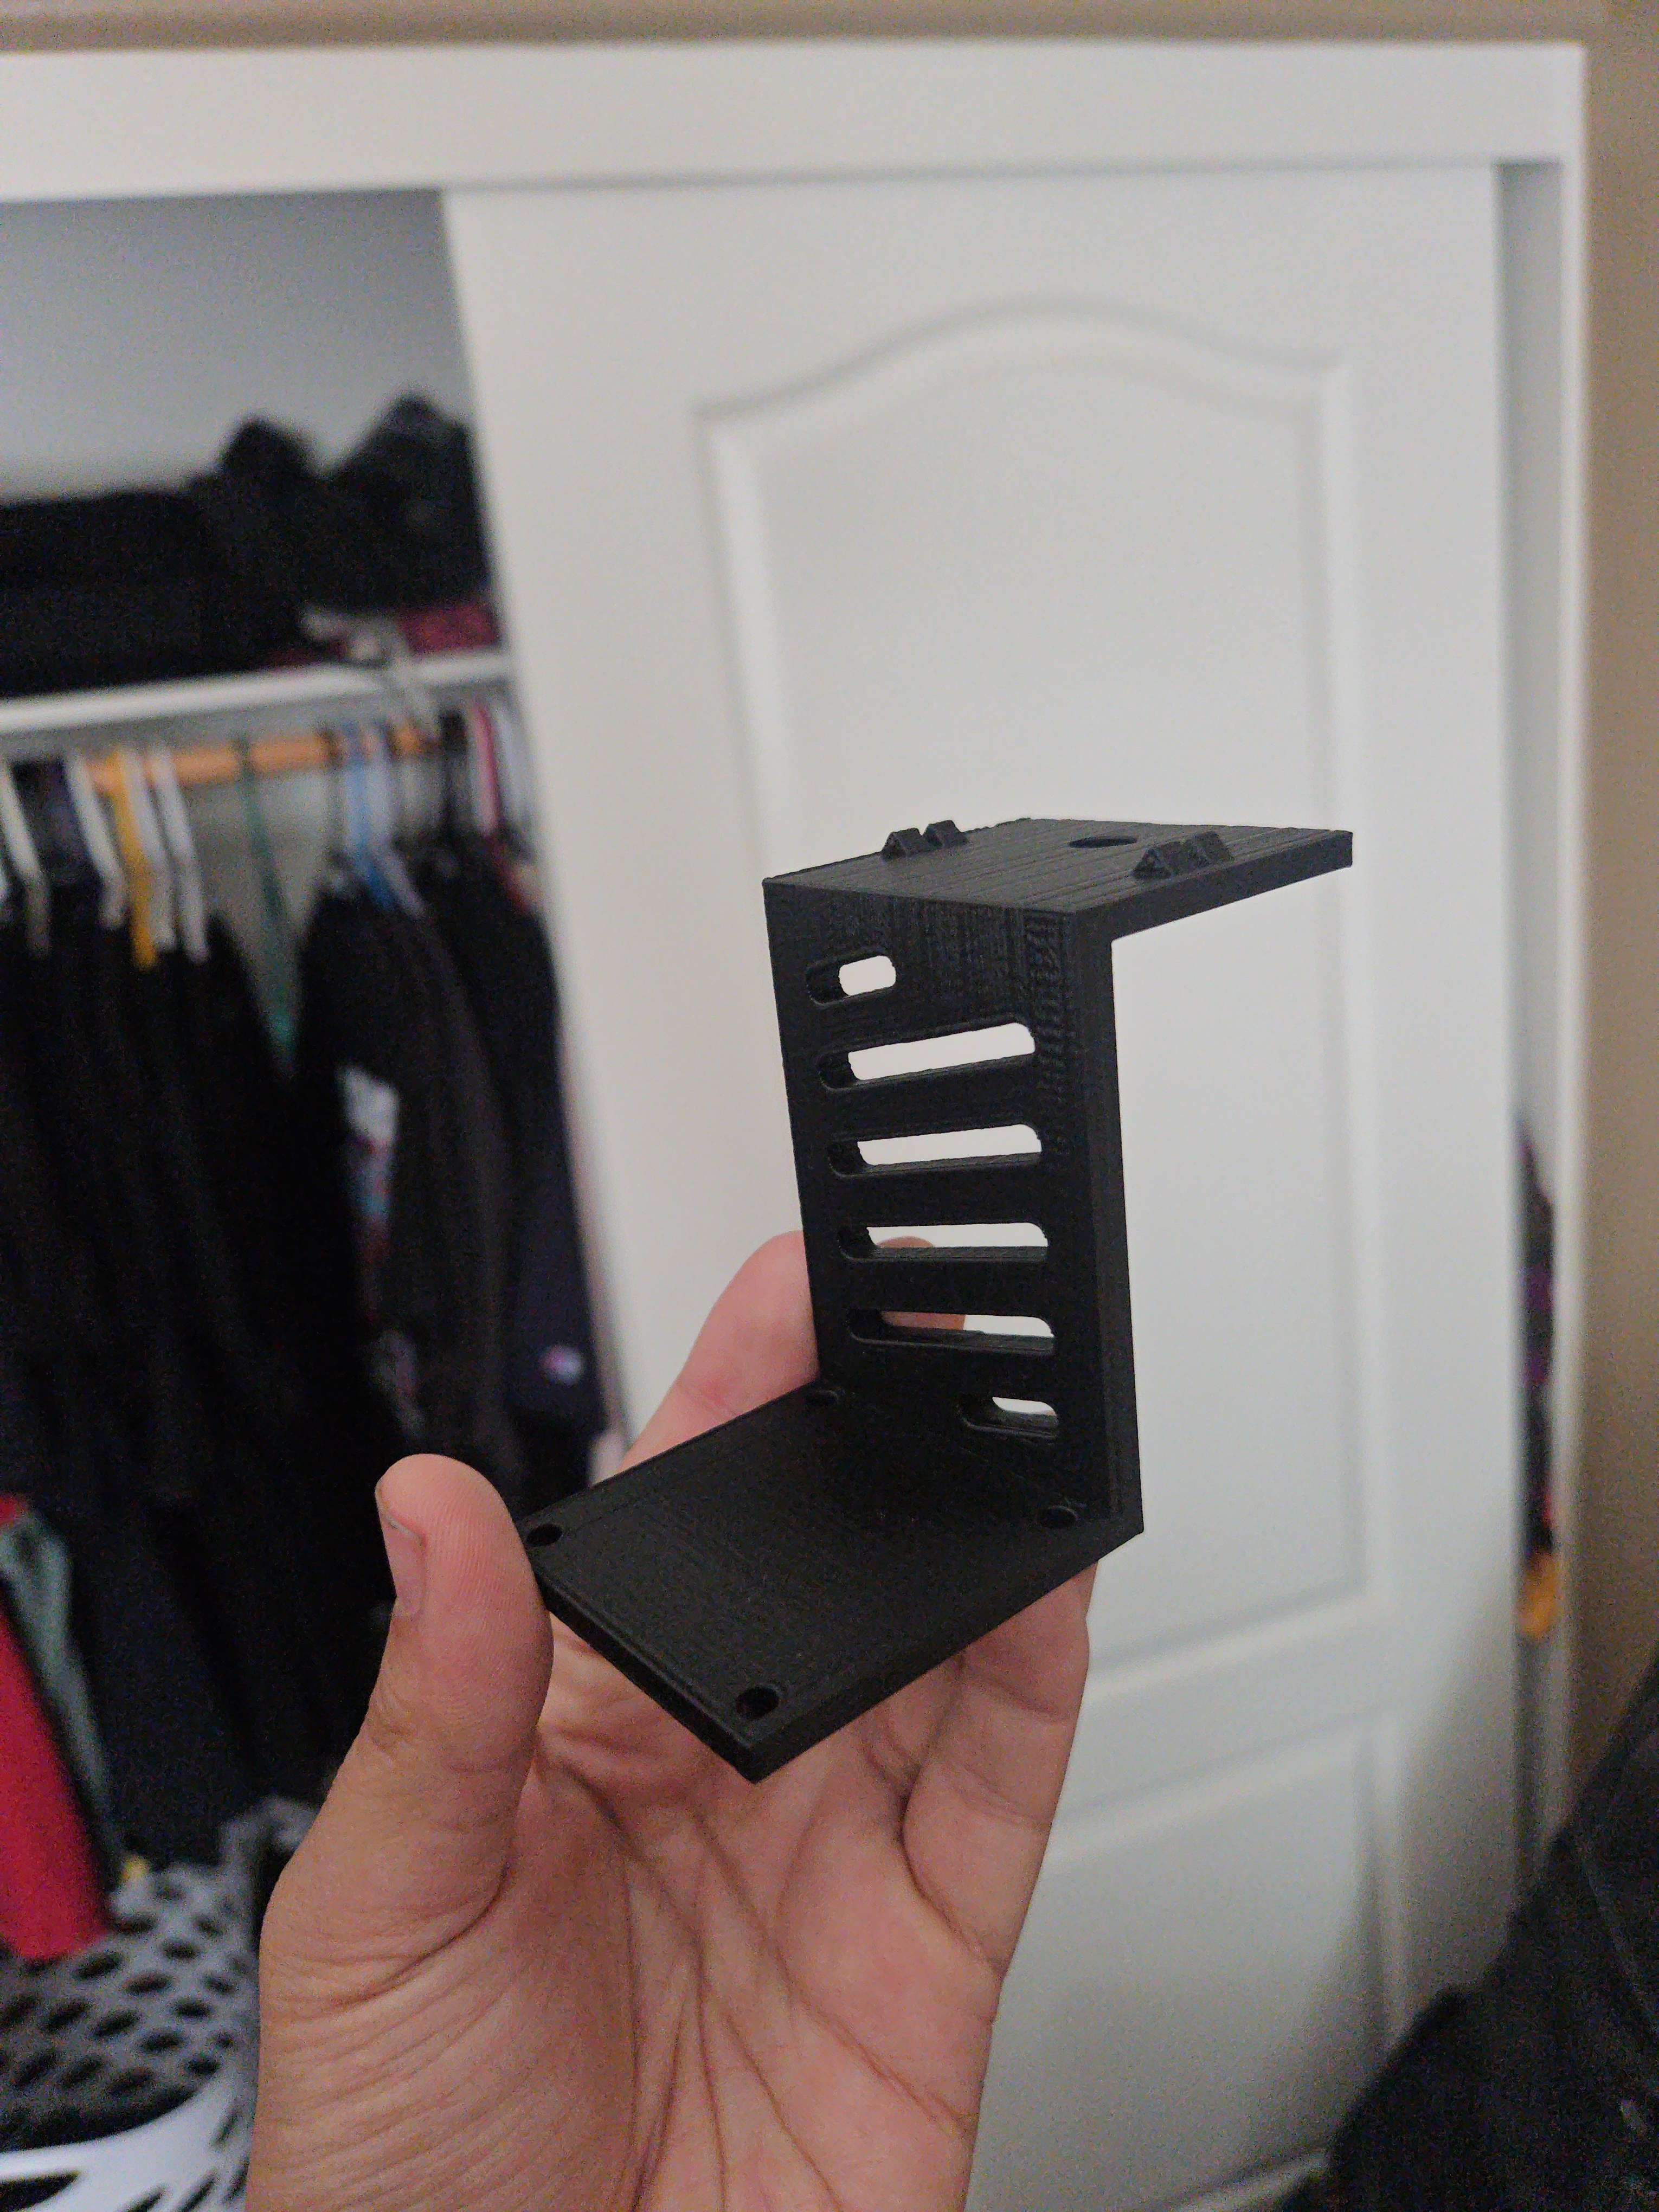
We also, at this point, absolutely demolished the front bumper from many close encounters with the door frame of our lab. One weekend, Jia and I took a field trip to try and find a good material we could construct a new bumper out of. Home Depot did not prove to be fruitful, and when we thought to visit a craft store like Michael's, we realized it was Easter Sunday and every craft store was closed...
So, in a last ditch effort, we went to the local Walmart Supercenter to see what we could come up with. To our delight, we found a yoga mat that was on sale for $4.99 which was the absolute perfect density. Returning to the lab with a yoga mat, 3M Super 77 adhesive spray, knives, and rulers, we constructed a bumper for the car that exceeded our, admittedly low, expectations.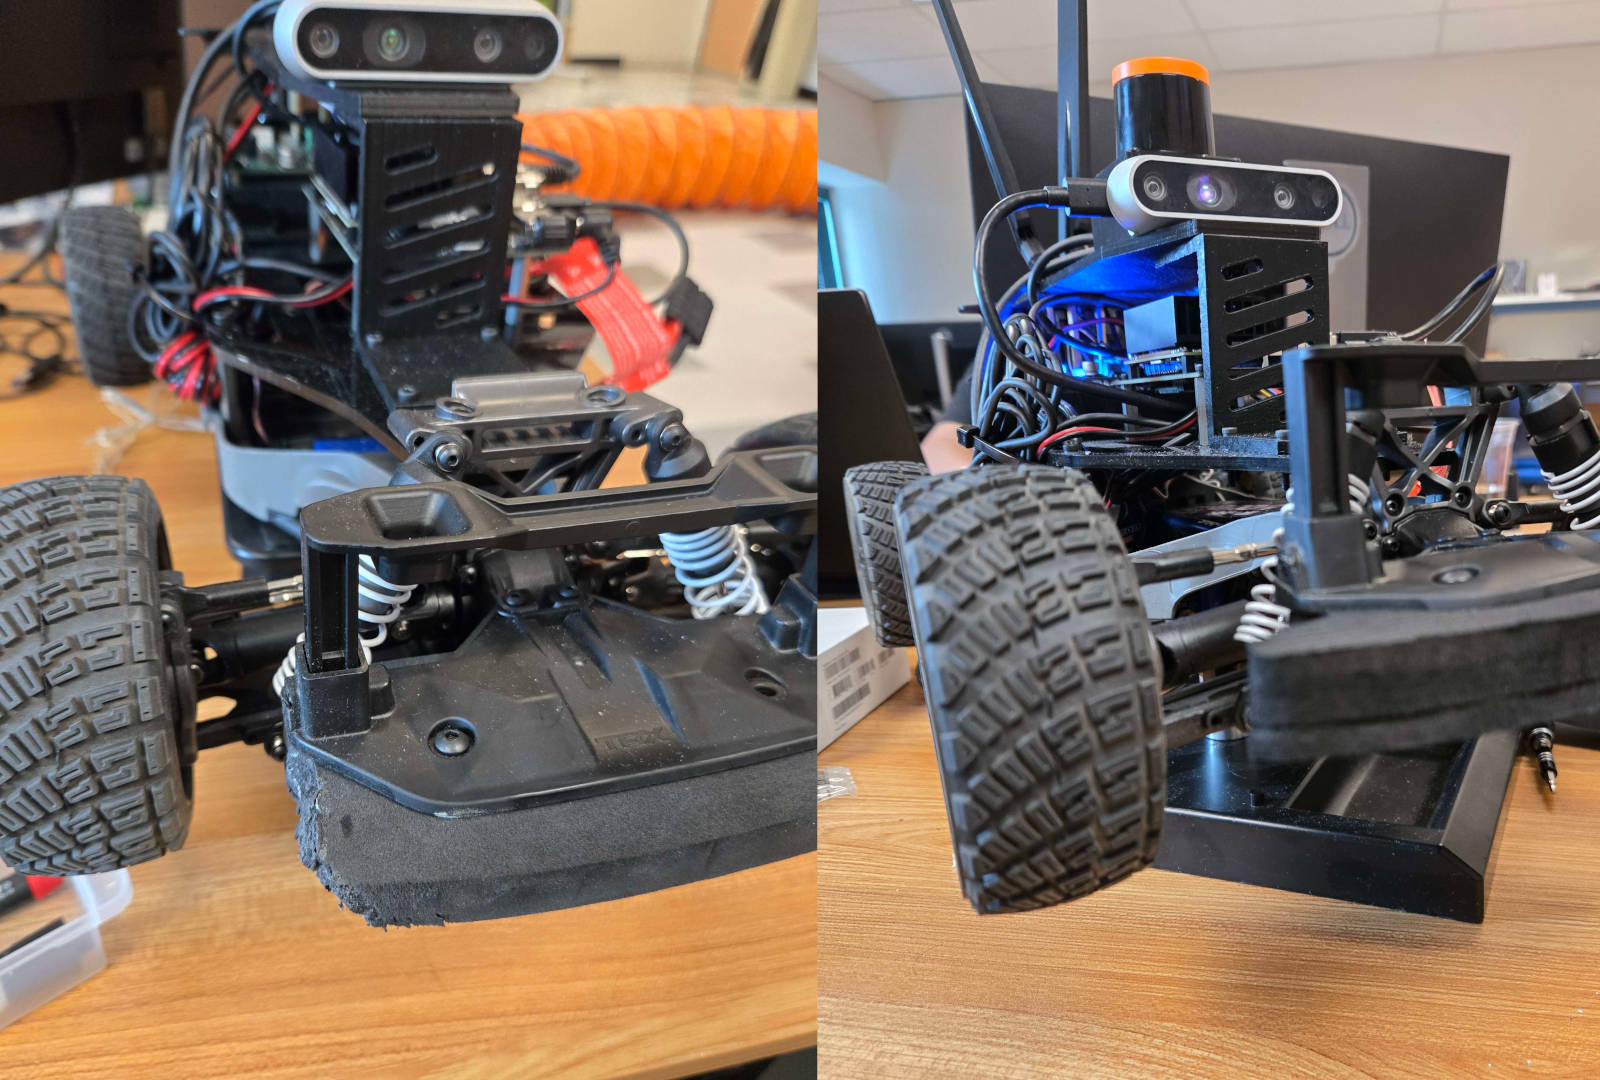
Our car being held together by duct tape, superglue, zipties, and dreams
So back to the drawing board; after
The first improvement was to design a physical interlocking component integrated into the two pieces rather than relying on melting or gluing them together. I ended up with this design, that snaps into place with a satisfying click. The triangular slopes are angled so that the piece can be printed on its side, if you've had experience working with 3d printing then you'll understand the importance of print orientation and how it affects the structural integrity. Tl;dr, due to how a 3d printer stacks material in layers, the items created are weakest between these vertical layers, and strongest on the horizontal axis where a constant flow of material is extruded.
In order to ensure a secure connection between the two pieces, I also extended the surface area which the two pieces have contact with each other, and threaded the screw which holds the depth camera through both pieces.
Two parts that connect together and can be separated by hand without need for sanding.
I also added some sweet looking vents to the front of the plate to reduce the drag. In all honesty this propably doesn't affect the speed very much at the scale of our vehicle, but I thought it looked really cool and makes our car stand out.
Style points never hurt anybody
We also, at this point, absolutely demolished the front bumper from many close encounters with the door frame of our lab. One weekend, Jia and I took a field trip to try and find a good material we could construct a new bumper out of. Home Depot did not prove to be fruitful, and when we thought to visit a craft store like Michael's, we realized it was Easter Sunday and every craft store was closed...
So, in a last ditch effort, we went to the local Walmart Supercenter to see what we could come up with. To our delight, we found a yoga mat that was on sale for $4.99 which was the absolute perfect density. Returning to the lab with a yoga mat, 3M Super 77 adhesive spray, knives, and rulers, we constructed a bumper for the car that exceeded our, admittedly low, expectations.
Our bumper before and after. The new bumper is made of three layers of yoga mat.
The Final Build
Wheeeeeee
Conclusion
Designing and assembling the car was a very fun application of some skills I've built up over time through my personal interests. However, this was only a small portion of the project
and much more of my time was spent on developing the algorithm for the races. If you're interested in reading more about this project click through to Part 2 where I discuss
the software end of the project as well as our final presentation.
--
Until next time, cheers~
Until next time, cheers~